The Sunshine Village Gondola offers some of the most spectacular photography opportunities in the Canadian Rockies, but capturing those perfect shots requires more than just pointing and clicking. Having ridden this gondola countless times during my training runs and ski trips, I've learned exactly when, where, and how to photograph from this aerial vantage point to get results that actually do justice to the scenery.
Best Times for Gondola Photography
Timing makes or breaks gondola photography. The golden hour—that magical time just after sunrise or before sunset—transforms the entire Bow Valley into a photographer's paradise. I always recommend the first gondola up in summer (typically 8:30 AM) when the light is soft and the crowds haven't arrived yet.
For sunrise shots, you'll want to check Parks Canada's current sunrise times and plan accordingly. In May 2026, sunrise is around 5:45 AM, which means that early gondola ride captures the perfect aftermath lighting. The shadows are long, the peaks glow, and you'll have relatively empty gondola cars.
Sunset rides are equally spectacular but come with challenges. Summer sunset gondola rides often sell out, especially on weekends. Book through GetYourGuide well in advance. The last gondola typically runs until 8:00 PM during peak summer season.
Weather plays a huge role. I've learned to check Environment Canada's mountain weather forecast obsessively. Clear mornings after overnight snow create the most dramatic contrast, while partially cloudy days add depth and texture to your compositions.
Camera Settings and Equipment for Gondola Shots
Gondola photography presents unique technical challenges. You're shooting through glass, dealing with movement, and often facing extreme contrast between bright snow and deep shadows.
Essential camera settings:
- Shoot in RAW format for maximum post-processing flexibility
- Use a fast shutter speed (minimum 1/500s) to counter gondola movement
- Start with ISO 200-400 to maintain image quality
- Aperture around f/8-f/11 for sharp foreground and background
- Enable image stabilization if your lens has it
The gondola windows can be surprisingly clean, but I always carry a microfiber cloth. Position your lens as close to the glass as possible without touching—this minimizes reflections and distortion. If you're shooting with a smartphone, the same principle applies.
A polarizing filter helps cut through reflections and enhances the contrast between snow and sky, but be careful not to over-polarize and create unnatural-looking skies. I typically rotate my polarizer to about 60% effect rather than maximum.
Recommended Equipment
For serious photography, I recommend a full-frame camera with a 24-70mm lens as your primary setup. This focal range covers everything from wide valley shots to tighter compositions of individual peaks. A 70-200mm lens is excellent for isolating distant mountains like Mount Assiniboine, but it can be unwieldy in crowded gondola cars.
Smartphone photographers shouldn't feel left out. Modern phones handle the dynamic range surprisingly well, and features like HDR mode help balance those extreme contrasts. Just remember that digital zoom degrades quality quickly—it's better to crop later.
Key Photo Opportunities During the Ride
The 8-minute gondola ride offers distinct photographic opportunities at different elevations. I've identified the best spots through dozens of rides over the years.
Lower Section (Base to Mid-Station): Focus on the Bow Valley spread below. Banff townsite looks miniature from here, and the Bow River creates natural leading lines through your composition. The Fairmont Banff Springs Hotel stands out clearly against the forest backdrop.
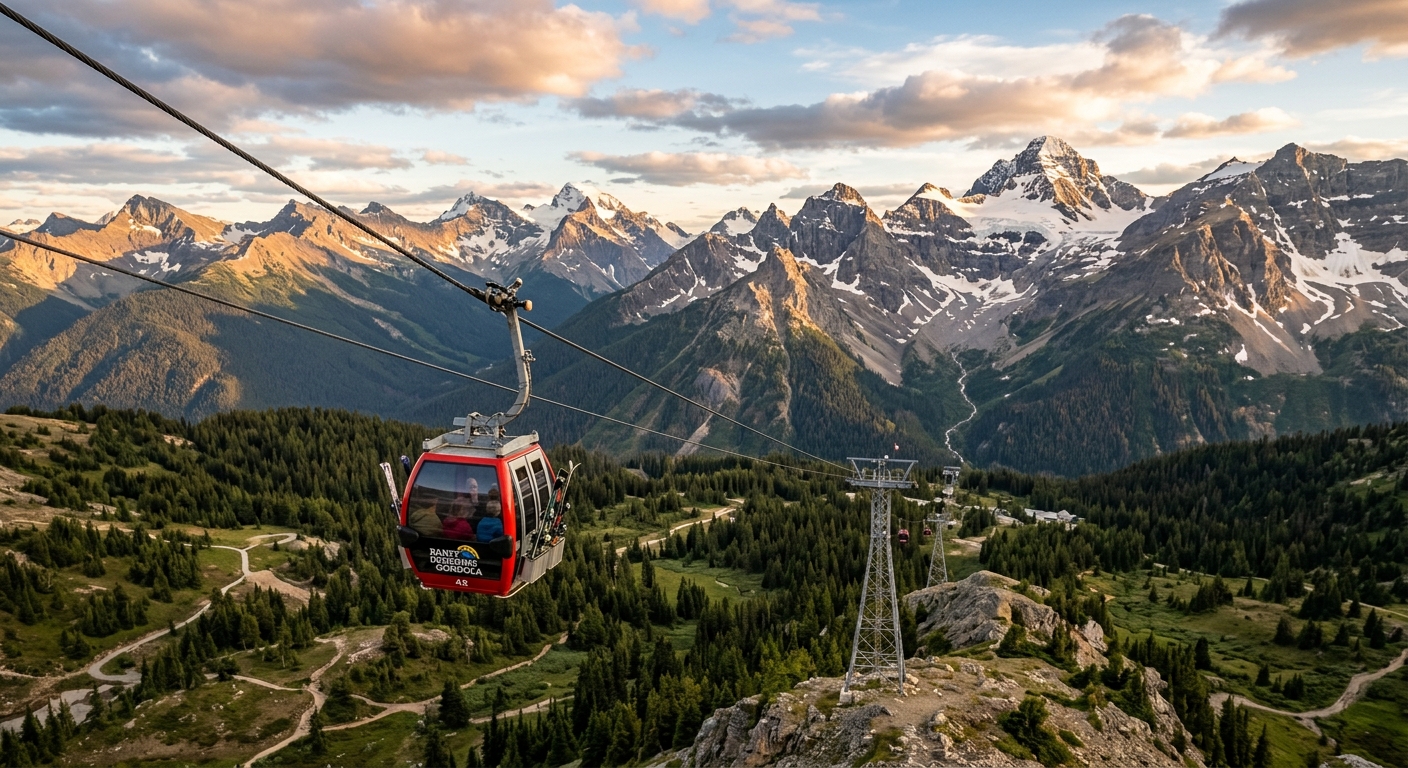
Mid-Section Views: This is where the real drama begins. Mount Rundle dominates the eastern view with its distinctive layered rock face. I time my shots for when the gondola passes the support towers—these create interesting foreground elements that add depth to mountain compositions.
Upper Section Approach: The final third of the journey offers the most spectacular views. The Continental Divide peaks come into view, and on clear days, you can see Mount Assiniboine in the distance. This section moves more slowly, giving you time for multiple compositions.
Don't ignore the view behind you. Looking back toward Banff provides a completely different perspective, especially of the Spray Valley and the mountains beyond Canmore.
Photography at Sunshine Village Summit
Once you reach the top, the photography opportunities multiply exponentially. The village sits at 2,160 meters elevation, providing 360-degree mountain views that change dramatically with the seasons.
Summer Photography (June-September): Alpine flowers bloom in incredible profusion. The meadows around the village burst with Indian paintbrush, mountain avens, and alpine forget-me-nots. I recommend the short walk to the Standish Viewpoint—it's only 10 minutes from the village but offers unobstructed views toward Mount Assiniboine.
Winter Considerations: If you're staying at one of the Expedia sunshine ski in ski out accommodations, you have incredible access for dawn and dusk photography. The village transforms into a winter wonderland, and the contrast between the warm lodge lights and blue snow creates magical compositions.
The observation deck provides the safest vantage point for photography, but venture onto the surrounding trails for more unique angles. The Rock Isle Lake trail (1.5 km each way) offers reflective water shots when conditions are calm.
Specific Shot Recommendations
Every photographer should attempt these classic Sunshine Village compositions:
- The Banff Valley Panorama: Shoot from the main observation deck using a wide-angle lens. Include some foreground elements like the deck railing or alpine vegetation to add depth.
- Mount Assiniboine Portrait: Use a telephoto lens to isolate this distinctive pyramid peak. Best light occurs in early morning when the peak catches the first sun.
- The Village Context Shot: Step back and include the gondola station and village buildings in your composition to show the human scale against these massive peaks.
- Seasonal Details: Don't forget macro photography opportunities. Summer wildflowers and winter ice formations provide intimate alternatives to the grand landscape shots.
Post-Processing Tips for Mountain Photography
Mountain photography from the gondola often requires significant post-processing to match what your eyes actually saw. The extreme dynamic range—bright snow against deep shadow—challenges even the best cameras.
I always shoot in RAW format, which gives maximum flexibility for exposure adjustments. Start by lifting the shadows to reveal detail in the valley, then carefully adjust highlights to prevent snow from blowing out completely white. The graduated filter tool in Lightroom works perfectly for balancing bright skies against darker foregrounds.
Color temperature adjustments make huge differences in mountain photography. Snow reflects the color of the sky, so morning and evening shots often need warming to counteract blue color casts. Don't overdo the saturation—mountain scenes look best with subtle color enhancement that feels natural.
For smartphone shooters, apps like VSCO or Adobe Lightroom Mobile offer similar adjustment capabilities. The key is restraint—these landscapes are already spectacular and need enhancement, not transformation.
Practical Planning for Your Photography Trip
Success with gondola photography requires logistical planning beyond just camera settings. Gondola tickets cost around $49 CAD for adults in summer 2026, with discounts for advance online booking.
If you're planning a comprehensive Banff photography trip, consider reviewing our 3-day Banff itinerary for optimal scheduling. The gondola works well as either a morning or afternoon activity, depending on your other plans.
Weather changes rapidly at elevation. Even on warm valley days, bring layers. I've been caught in sudden snow squalls in July that made photography impossible but created incredible atmospheric conditions an hour later.
Parking at Sunshine Village base fills early during peak season. Arrive by 8:00 AM or consider staying overnight in Banff and taking the shuttle service. Check our where to stay in Banff guide for accommodation options that provide easy gondola access.
The gondola operates seasonally, typically from late May through early October for summer operations, then December through April for skiing. Always verify current operating schedules with Sunshine Village directly, as weather can affect operations even during normal seasons.
Battery life decreases rapidly in cold conditions, so bring extras and keep them warm. I learned this lesson the hard way during a January photography session when my camera died just as the light turned perfect. Pack a small thermos with hot coffee—you'll appreciate it during those early morning shoots, and other photographers will definitely appreciate your thoughtfulness.
Enjoyed this guide? Get weekly Banff tips.